Roof Repair
Roof flashing repair in San Jose
Roofs rarely leak in the middle of a slope. They leak where they meet something: a chimney, a wall, a skylight, a pipe. Those joints are sealed by flashing, and flashing only works when every piece laps the right way.

What we treat
- Concrete and clay tile
- Composition shingle
- Flat, torch-down and TPO
- Spray foam
- Standing seam metal
Quick answer. Roof flashing repair in San Jose replaces failed metal at chimneys, walls, skylights, vents and roof edges, installing step flashing course by course, counterflashing let into mortar or behind siding, and kick-out flashing where a roof edge meets a wall, all lapped so water always runs over the piece below. Most flashing repairs take a single day.
Updated September 2026
The job
Why flashing fails and why caulk does not fix it
Flashing fails when it rusts, when it was short or missing to begin with, or when the sealant it relied on dried out. The giveaway is a roof with a tube of caulk's worth of patches around the chimney.
Caulk is not flashing. It shrinks, cracks and lets go within a season or two. A lasting repair removes the covering along the joint and rebuilds the metal in sequence.
What happens after you call
How a flashing repair runs
- 1
Find the joint
Traced from the stain to the flashing that failed.
- 2
Open it up
Covering and trim removed along the joint.
- 3
Check the wood
Soft sheathing replaced.
- 4
Rebuild in sequence
Each piece lapped over the one below.
- 5
Close it up
Covering and trim reset.
- 6
Water test
Hose test before we leave.
Warning signs
Signs the flashing has failed
- Stains beside a chimney
Water is getting past the step or counterflashing.
- Caulk piled on metal
Earlier patch attempts that are failing.
- Rust on flashing
Steel flashing has corroded.
- Wet siding below a roof edge
No kick-out flashing.
- Leaks only in wind-driven rain
Short or badly lapped flashing.
- Peeling paint on fascia
No drip edge.
Jobs this page covers
Chimney flashing and counterflashing
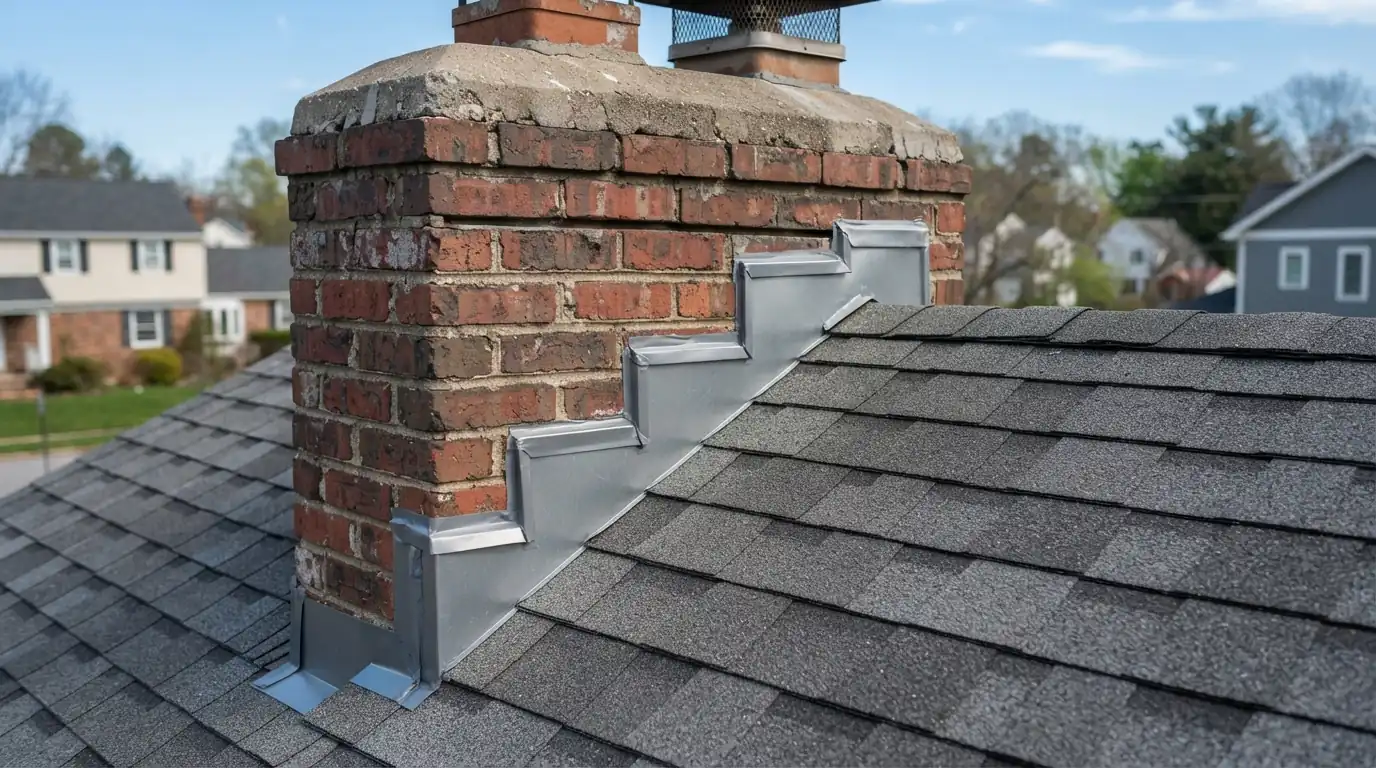
A chimney needs flashing on four sides: an apron at the bottom, step flashing up each side, a cricket or saddle behind it where the roof dumps water against the brick, and counterflashing let into a cut mortar joint to cover the tops of the step pieces. We cut a new reglet into the mortar rather than surface-mounting the counterflashing with sealant. Cracked crowns and loose bricks at the flashing line are noted for a mason when they are beyond our scope.
Step flashing at walls
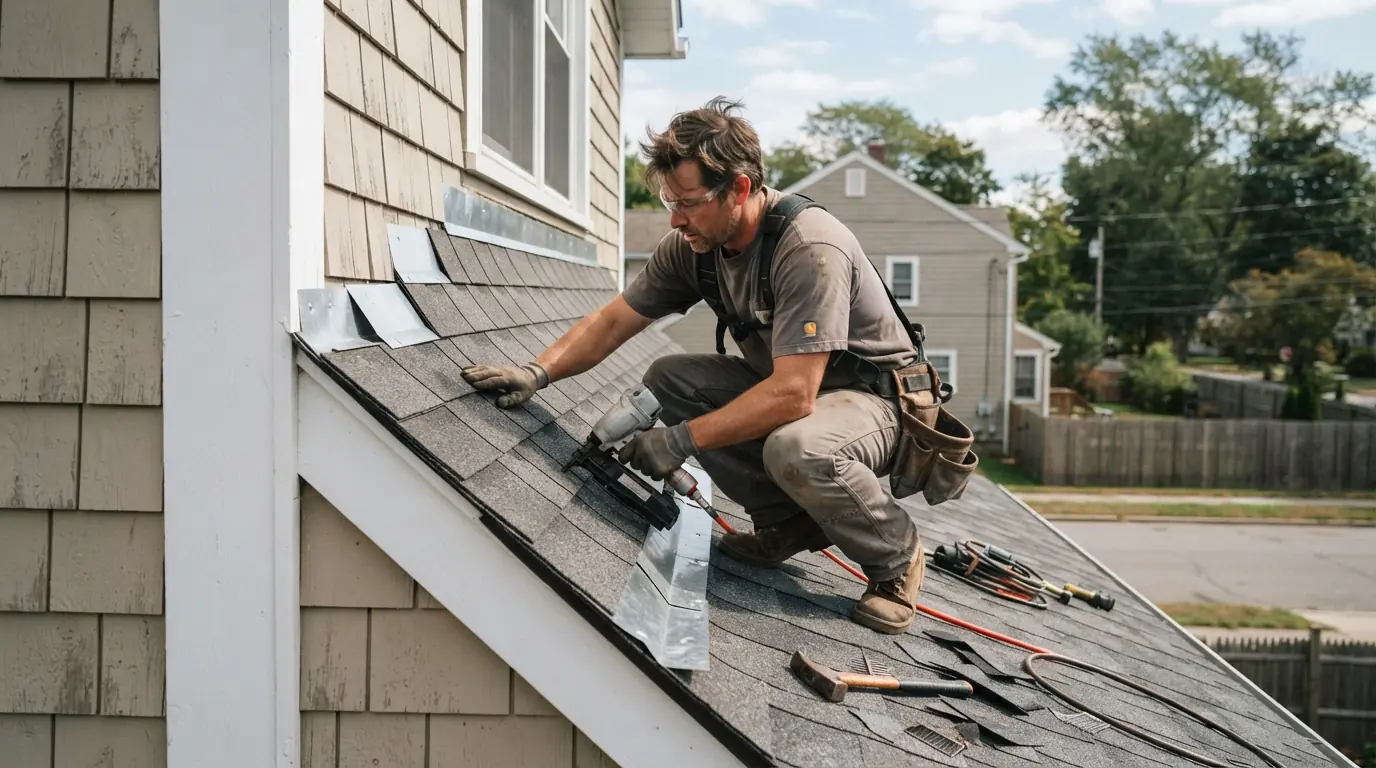
Where a roof runs up against a second-story wall, each shingle course needs its own L-shaped piece of step flashing, tucked under the siding or housewrap above and lapped over the piece below. A single long piece of flashing, or flashing face-nailed through the shingles, will leak. We remove the siding trim and shingles along the joint, install new step flashing course by course, and reset the siding so it covers the vertical leg properly. On stucco walls, we cut only a narrow band to reach the old flashing and patch it once the new metal is in.
Skylight and vent flashing
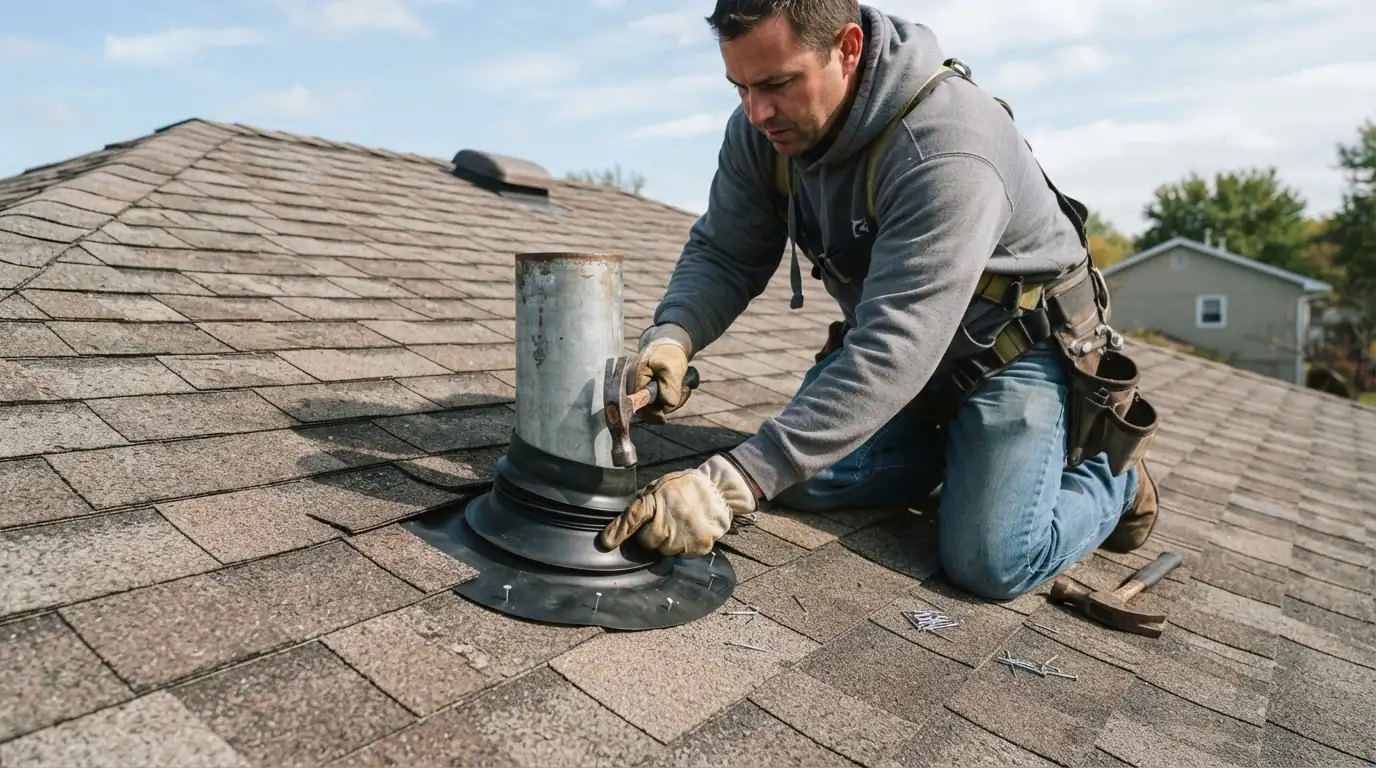
Every pipe, vent and skylight is a hole in the roof sealed by flashing. Pipe boots crack, exhaust vent flashings rust, and skylight curbs get face-nailed. We replace boots with metal-based flashings where the sun is hard on rubber, install new vent flashings woven into the courses above them, and rebuild skylight flashing in sequence. On tile roofs, penetrations get lead or aluminum flashings shaped to the tile profile. Satellite and solar mounts through the roof are resealed or reflashed on the same visit.
Drip edge and kick-out flashing
Where a roof edge ends against a wall, water running down the step flashing needs to be turned away from the wall and into the gutter, or it soaks the siding and the framing behind it. A kick-out flashing does that job and is missing on a lot of older houses. Drip edge along the eaves and rakes throws water clear of the fascia. Both are small pieces of metal that prevent a lot of rot. Adding a kick-out is usually an hour or two of work at each wall junction.
What we see on San Jose roofs
Tile is common on San Jose's Mediterranean and Spanish-style homes, and flashing on a tile roof works differently from shingle. Walls and chimneys get pan flashings under the tile with a raised edge, headwalls get flashing that follows the tile's profile, and pipes get soft lead or aluminum flashings shaped over the tile's curve. Getting those details right is most of what a tile roof leak repair involves.
Stain by the chimney or a wall? Call before the next storm.
(669) 259-7490Cost
What flashing repairs cost depend on
Flashing work is priced by the joint, since the covering along it has to come off and go back.
- Length of the joint A long wall costs more than a single pipe.
- Roof covering Tile takes more care to lift and reset.
- Siding removal Trim or stucco along walls may need work.
- Chimney details Crickets and reglets add time.
- Rotted sheathing Wet wood at the joint is replaced.
- Height and pitch Steep or high joints need more setup.
FAQ
Questions we get asked
Sealant is a temporary fix. We replace flashing that has failed.
Yes, on chimneys wide enough to need one.
Trim is removed carefully and reset; stucco patches are kept small.
Yes, with pan flashings and shaped lead or aluminum.
Usually not when it is wear; sudden storm damage may be.
Same category
Related roofing work
Shingle Roof Repair
Torn, missing and curling shingles, nail pops and ridge caps on composition roofs.
Learn moreTile Roof Repair
Cracked and slipped tiles, failed underlayment and valley repairs on concrete and clay.
Learn moreFlat Roof Repair
Ponding, blisters, split seams and foam cracks on low-slope roofs.
Learn moreSkylight Leak Repair
Curb, flashing and seal failures on skylights and sun tunnels.
Learn moreGet the flashing rebuilt properly
Tell us where the stain is. We trace it to the joint, rebuild the flashing and test it before we leave.